
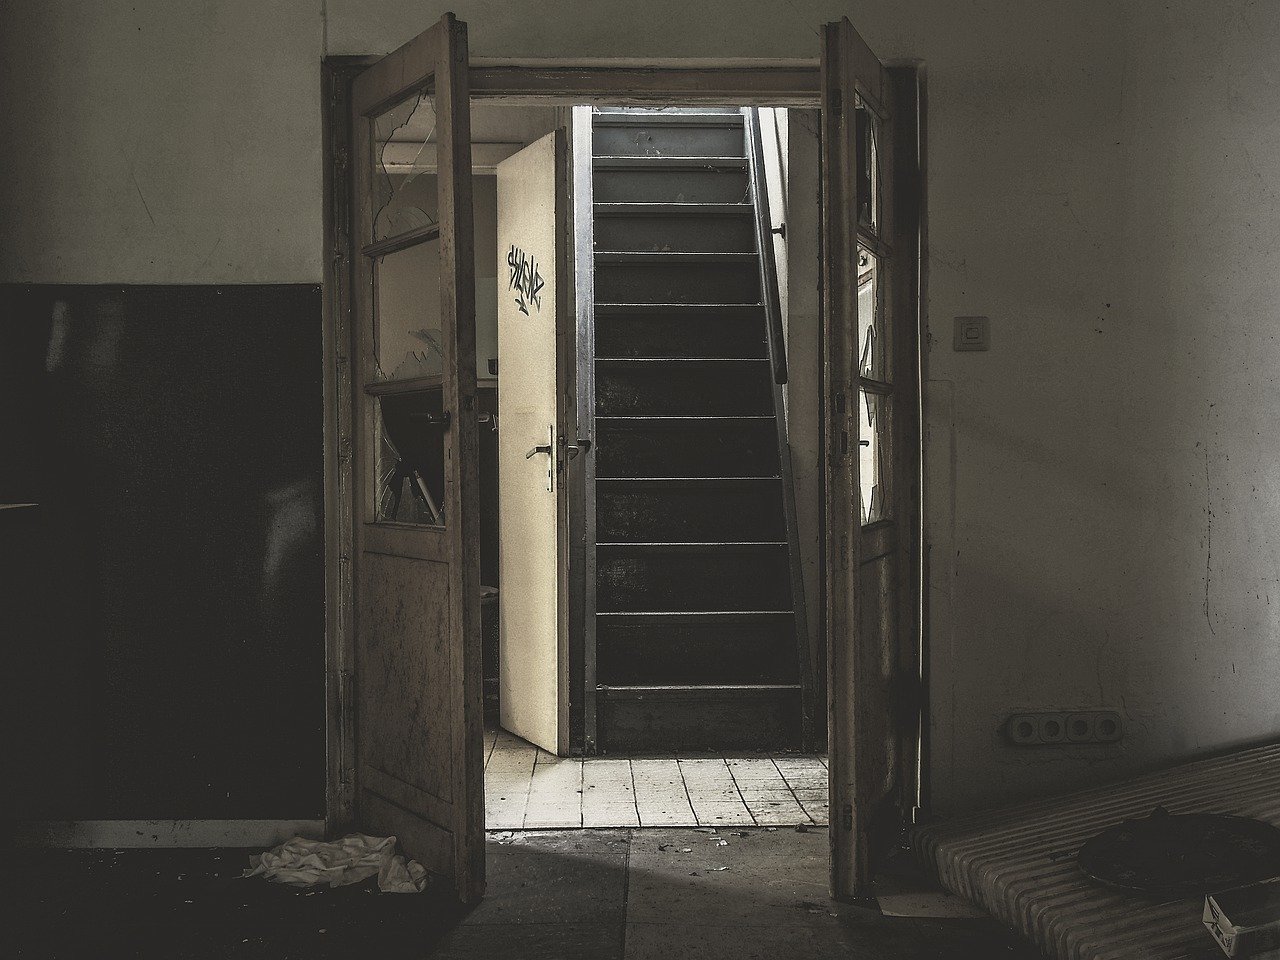
The popular image of a “fixer-upper” home purchase is an almost romantic vision which makes turning a dilapidated mess into a dream home seem simple. Or if not simple, at least fun – and the truth is that there can be plenty of moments to enjoy in overhauling a house. However, if you go into this tough task with the impression that it’s going to be anything other than sheer hard work, you may be in for an unpleasant surprise.
A few light renovation touches can be a nice way to spend half a day, but when it comes to a fixer-upper, you need to know the work is going to be intensive. If you’re doing it all yourself, then you have the need to get it all done in a tight time frame so as not to cut into your schedule. If you’re contracting the work out, time is still of the essence, because you don’t want to be paying for extra work that goes on beyond your deadline. With a lot of work to be done, you therefore need to be sure what needs to be ruled in – and out – when you set the road map for your fix-up. And just as important, you need to set some priorities.
The truth is, some jobs in a remodel – or, in the case of this kind of project, rebuild might be more accurate – matter more than others. There are the jobs that absolutely must be completed, and often have to be signed off before any other work can even be begun. Then there are jobs that we’ll call “Still Important”; they are tasks that need to be completed before you can even begin to think of living in the house, and should be done before any decoration takes place.
After that, you have jobs that aren’t strictly essential, but are the difference between a completed shell and a liveable home; we’ll call these “Necessary” jobs. Only after all of these have been provided for, can you begin to consider the little touches that prettify a home and make it special. Below, we will go into what kind of works fall into each category and when you can consider each phase complete.
Phase one: Must-complete works

In a house that needs a complete overhaul, it is likely that there will be major structural works to undertake. These will either have been identified at the initial house inspection before you took ownership of the house, or so obvious that you already had them at the forefront of your mind when kicking over the basic plans. If there are beams that need replacing, walls (interior or exterior) that need rebuilding, and even floors that need to be reconstructed, then these need to be the initial priority – without this kind of work, it might not even be safe to start any other work.
Also included in this category is anything that happens beneath the surface. For example, the wiring needs to be completed before you finish a wall, because it lives within that wall. Similarly, plumbing and any kind of HVAC system need to have been at the very least preliminarily completed. Coming back to put them in place after everything else has been done will mean undoing work that’s been signed off, and then having to redo it again. There may be some elements of plumbing and electrics that can be finished later on, but the skeleton needs to have been completed and any further work pencilled in before you start work on anything else.
Phase two: Important works

When you’ve got the shell nailed down, you can then turn to the parts of the reconstruction that may now be done safely thanks to the structural renewal that has already been done. If the house has needed extensive work, it is a safe bet that many of the essentials such as doorways and windows will have needed some repair, so replacement windows should be a definite priority along with a solid front door that is secure and durable. It is also essential to ensure that all walls and floors are ready to be finished – this may not be time to paint, wallpaper and lay carpets or flooring, but if there is plastering or skirting that needs to be done, then it should be done now before you add finishing touches in those areas.
Every fix-up will have its own individual touches, of course. After all, part of the attraction of buying a fixer-upper is the idea of stripping everything back to basics to then put your own stamp upon it. If you have any particular showpieces to put in place, then now will be the time to secure that space – marking off where those showpieces will go and then working around that area to ensure that it doesn’t get compromised during your work in the rest of the house. Those touches should not be put in place now. Installing a kitchen island or a multimedia center before you decorate will just crunch the available space and potentially cause the piece de resistance of your remodel to get damaged before it’s even used.
At this point in proceedings, it is also wise to declutter, and work through the home and garden and remove anything that is no longer of any use. Bits of old masonry and damaged floorboards, pipework and anything that was left in the house before its sale, should then be taken to a tip or repurposed in whatever way possible. At every stage of the fix-up, you should be looking to work with as blank a canvas as possible. That will make the work quicker and easier, and less expensive as a result.
Phase three: Making it look like a home

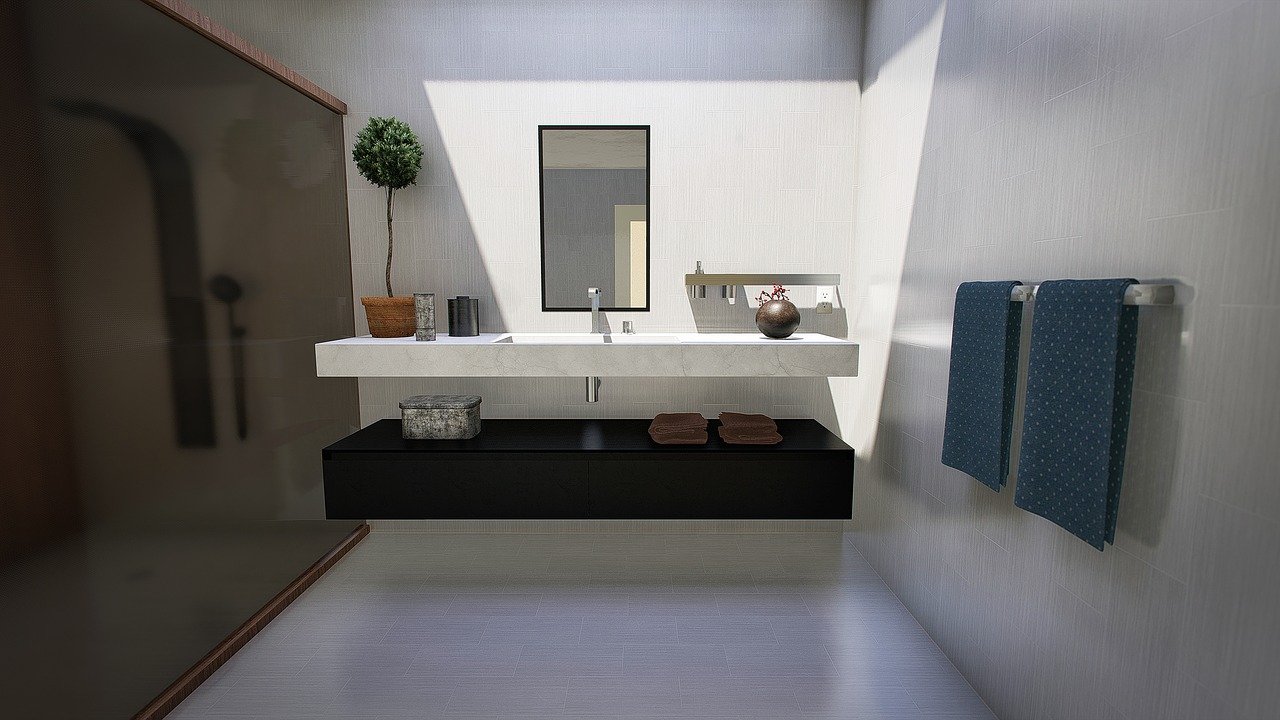
Once you’ve done the initial work of making a home structurally safe, and then built upon it to give it shape, the next part of the process is adding the bits that make it like new again. By this point you should have a viable floor and walls in place; now it’s about taking them from the “safe and solid” stage to the “welcoming home” stage. This is the time to hang wallpaper and paint walls; to decide on solid wood flooring or carpet (or any other floor covering); to add those decorative touches that give a home its identity.
Painting, papering and flooring should be in place before you start to add those showpieces we talked about. Before you begin to think about the finishing touches – a clock here, a framed artwork there – you should, then, add the bulkier elements of the home. If everything has been done in order, your multimedia center should have a power supply that can be hidden from view by the casing. The kitchen island should have the power points, and water supply (if any) that you have been planning. All that you then need to do is move these items into place, hook them up with utilities, and you can be ready to make your next moves.
This phase of the project is also when you will add furniture, from couches and chairs in the living room, to a dining set in the room you’ve chosen for eating, to beds, wardrobes and dressers in the bedrooms. Once all of this has been satisfactorily completed, the home is ready for people – you, or a potential buyer if you’re flipping the home – to move into.
Phase four – Finishing touches
If you’re going to take on a project for real, then it’s a good idea to throw your whole back into it, and so finishing off a fixer-upper is about adding those little touches that make it a desirable home. Those touches can be decorative – like planting trees outside and placing ornaments where you feel they should go – and they can be practical, such as adding a BBQ grill in the garden or adding smart home technology. A smart speaker in the living room, or even one per room, can work wonders in this regard, as can a thermostat and lighting setup that can be controlled from elsewhere via an app.
These are, of course, merely some ideas that can work to complete a fixer-upper; as we’ve said, one of the most important aspects of this work is to stamp a personal touch on the home. It’s your decision how you choose to do that, particularly if you’re planning to live there once it’s all complete. The important detail is that you will have taken the home from bare bones and unlivable to something special and remarkable – and if you prioritize the work correctly, it doesn’t need to be a drawn-out project.
Turning a dilapidated old house into something new and special is something a lot of people will jump at the chance to do. If you put some effort into the prior planning, you can get the results you were dreaming of without that fixer-upper becoming a money pit – and the results are something you can always be proud of.